Easy, chocolate and free! What could be better? Hope you enjoy these fantastic low stress dessert recipes!
Category: Recipe
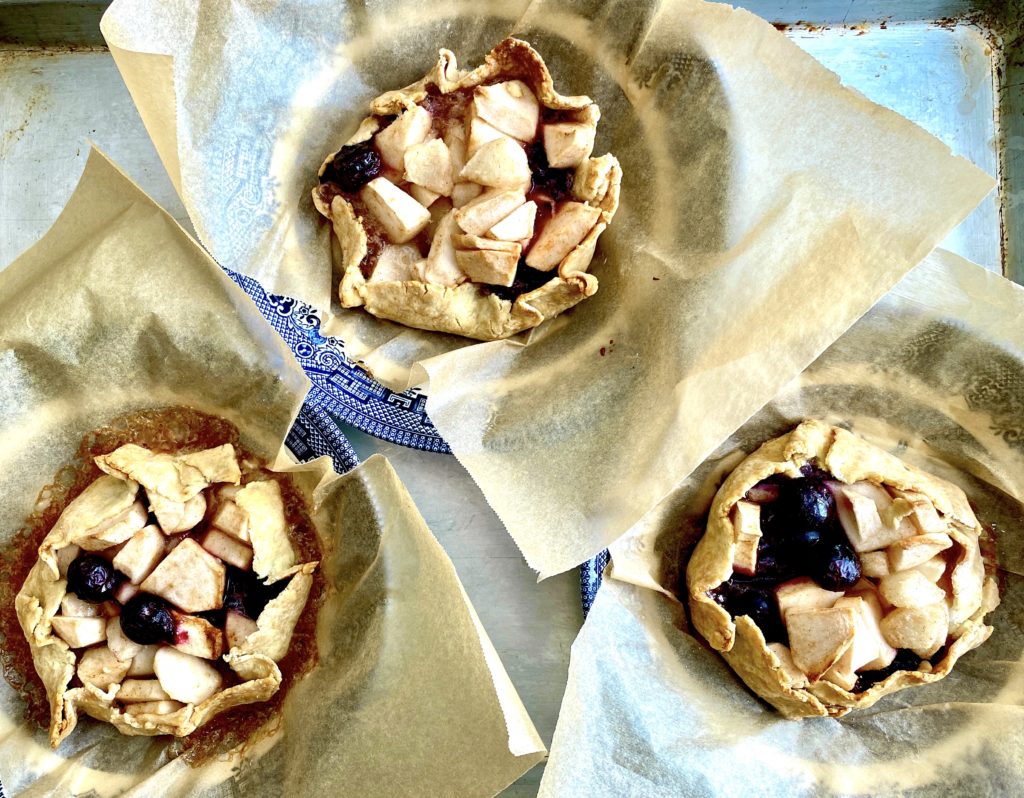
Gluten Free Fruit Tarts
I’ve been experimenting with gluten free recipes, because someone dear to me is on a gluten (and egg) free diet. I love the properties of gluten that give us beautiful airy breads and flaky pastries, but some people must go without it. I am almost hesitant to share my new recipe as I have only made it once and I’m sure that I will make changes in the future. That being said – the tarts came out pretty good!
Recipe
Pastry Dough
- 4 oz. (~3/4 cup) gluten free all purpose flour blend (I used Hannaford’s Nature’s Promise)
- 1.3 oz. butter (1.5 tablespoons)
- 0.7 oz. cream cheese (1.5 tablespoons)
- 1/2 teaspoon sugar
- 1/4 teaspoon baking soda (could probably eliminate)
- 3 tablespoons milk (could use water)
Fruit Filling
Mix together the following right before filling the tarts:
- 3 cups of fruit pieces ( I used diced apples, diced pears and blueberries)
- 1/3 cup sugar
- 2 tablespoons cornstarch
- 1/4 teaspoon cinnamon


Above is a little video I made a while ago showing how I roll and shape this style of little tarts (crostatas). The dough in the video is my regular pie dough, not gluten free.
Method
- To make the pastry the dough: Blend all ingredients except for milk (or water) in a food processor or with a pastry blender, until crumbly.
- Gradually add liquid using a fork to toss ingredients together until moistened. May not need all of the liquid.
- Shape into 3 balls of dough. Cover and refrigerate for 15 minutes or longer.
- Roll out each piece of dough to about 7 inches using a little cornstarch to prevent sticking. I actually used my tortilla press for the tarts shown above and pressed the dough between sheets of plastic cut from a ziplock bag.
- Place 1/3 of the filling on the rolled out dough and fold the dough over the filling. (See video above.) Repeat with the other two pieces of dough. Sprinkle with sugar if desired and bake at 400ºF on parchment paper lined bowls or sheet pan for about 25-30 minutes. Check oven often. Filling should be bubbly when done and the crust a golden brown.
- Happy baking!
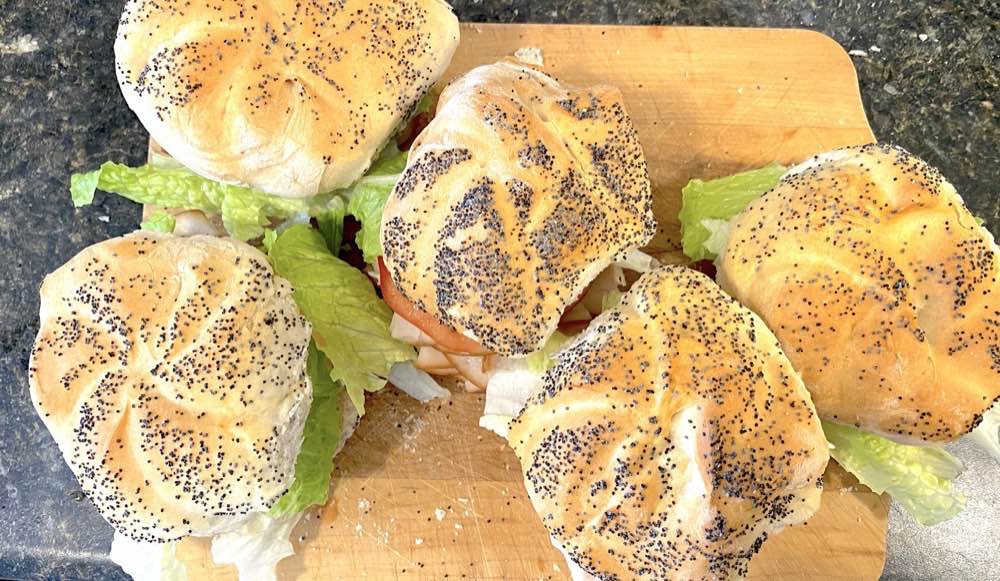
Exploring Capital Region Bakeries, No. 2
This week, for our series Exploring Capital Region Bakeries, I visited Prinzo’s Bakery at 344 Delaware Ave, Albany, NY. Being from Utica, Prinzo’s reminded me of the wonderful Italian family bakeries in East Utica that were once great in number. This is a bakery to go to for crusty old fashioned Italian bread and rolls. The prices were so LOW. I purchased 2 loaves of bread, 6 hard rolls, several large dinner rolls and pizza dough for around $10. (I should have been more accurate, but I was thinking about lunch!) If you’re in the vicinity, I highly recommend!

Pear Almond Tart in a Soup Bowl
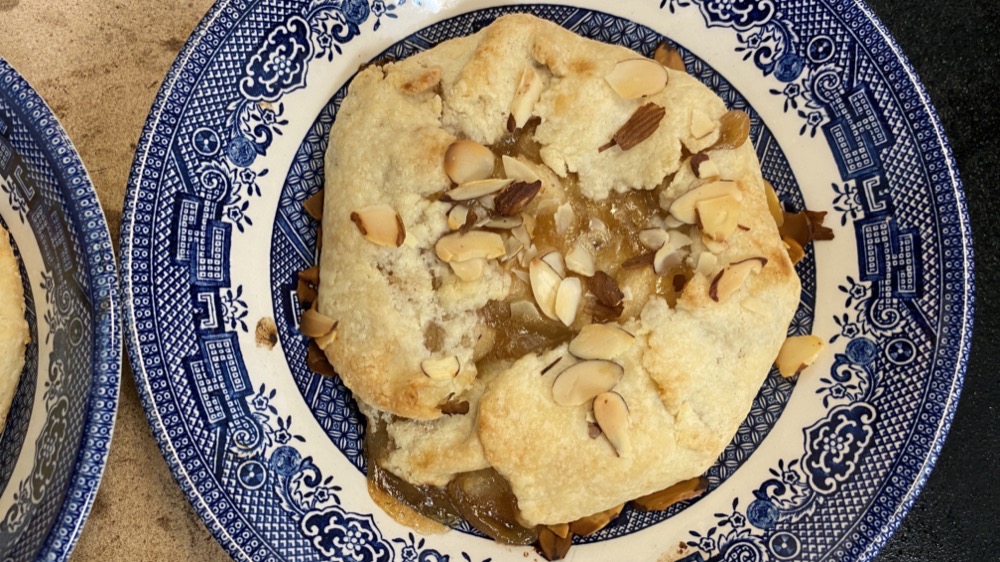
Sometimes it’s fun to use oven-proof soup bowls to make little fruit pies or tarts in. They can be reheated right in the same bowl, they look pretty and there’s no dirtying anything extra. We had a restaurant customer that said (many years later) how she always remembered being served a plum tart that had been made in a one of our soup bowls. It like a custom packaged treat!
BE SURE TO USE OVEN PROOF BOWLS!
For my regular pie recipe and video click here. I made this dough the same way, but used a little higher butter-to-flour ratio and also used all purpose flour as I know many people don’t have access to pastry flour as in my original video.
Recipe
Dough
- 6 oz. all purpose flour (1 + 1/4 cups)
- 1/4 teaspoon salt
- 1 tablespoon sugar
- 4 oz. cold butter (8 tablespoons or 1/2 stick), cut into small pieces
- Measure flour, sugar and salt into a large bowl.
- Rub or cut butter with a pastry blender into the flour until pieces are quite small (like little flakes or pebbles). This can be done in a food processor with a cutting blade. Try not to let the butter melt. If using a food processor, transfer the mixture to a bowl and add water as in Step-3.
- Add water gradually, while tossing the mixture with fork. If the mixture appears dry, add a little extra water, one teaspoon at a time. If it seems too wet (this is most likely to happen on humid days) don’t add all of the water. If necessary, you can add a little more flour, but try to avoid this. On a hot day, use ice water.
- Gently shape the mixture into 4 small balls of dough, dust with flour and flatten slightly. Wrap well and refrigerate until needed. May be stored in the refrigerator for 1-2 days or in the freezer for a longer period of time.
Filling
For the filling, just toss the following ingredients together. Do right before making the tarts.
- 3-4 cups diced pears
- zest from half of lemon
- 1/2 cup brown sugar or to taste
- 3-4 tablespoons flour (depends on the moisture content of your pears)
- 1/4 teaspoon cinnamon
- Roll out each ball of dough fairly thin and large enough to fit your bowl. (BTW – Can also be made without bowls and just placed on parchment paper lined baking sheets.) I like to use a pastry cloth to roll the dough on (or as in the case of my little video, a large dishtowel). Also, a sheet of plastic on top of the dough is very helpful too.
- Fill with a quarter of the fruit mixture and fold edges of the dough over the filling as shown in video.
- Top with almond slices (or not – it’s up to you!)
- Bake at 400F for about 25 minutes. BE SURE TO USE OVEN PROOF BOWLS!
Aldi Springform Pan and Peach Blueberry Cake
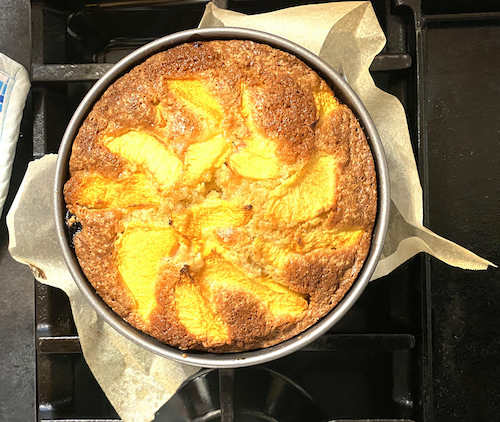
I shop at Aldi frequently and love looking at their special buys. This week I came across this cute little “Made in Germany” Springform pan. I couldn’t help from buying it! I like the German style springform in that the bottom locks in tightly and creates a little tray. Also, the parchment paper can easily extend beyond the borders of the pan, meaning I don’t have to cut little circles out of parchment paper!
Here is a little recipe and my review:
Blueberry Peach Cake
You can use many types of pans to bake this super moist light cake. To prepare an 8 x 8 glass square pan, just spray with non-stick spray. To prepare the springform pan, line with parchment paper and spray with non-stick spray.
Ingredients
- 1 cup sugar
- 1 1/4 cups all purpose flour
- 1/2 teaspoon baking powder
- 1/2 teaspoon baking soda
- 1/4 teaspoon cinnamon
- 2 large eggs
- 1/4 cup oil
- 1/2 cup yogurt
- 1 teaspoon vanilla extract
- 1/2 teaspoon almond extract
- 1/2 teaspoon lemon zest
- i large peach, peeled and sliced
- 1 cup fresh blueberries
Method
- Combine first 5 ingredients in a bowl. Whisk together. If lumpy, sift.
- In a separate bowl or large measuring glass, combine eggs, oil, yogurt, extracts and zest. Mix well.
- Add liquid ingredients to flour mixture amnd mix until just incorporated. Gently stir in blueberries.
- Place half of the peach slices in the bottom of the prepared pan. Pour over batter and then arrange the remaining peach slices on the top.
- Bake in a preheated 350F oven until a toothepick inserted in the center comes out clean. The square pan should take about 45 minutes. The 7 inch springform pan takes about 65 minutes.
- If using the springform pan, let the cake cool in the pan for about 10 minutes. Then carefully run a knife (don’t want to scratch the pan)around the edge of the cake and open the springform. Cool on a rack and dust with powdered sugar to serve, if desired. A little whipped cream or ice cream would be nice too!


Review: I like the pan’s baking quality. The cake came out of the oven with a beautifully proportioned top crust. It released from the pan easily and the crumb was gentle, even and moist. The only downside is that it’s a “non-stick” pan, but for $4.99, I can’t complain. Just be careful and try not to scratch the surface. Happy Baking! -Susan
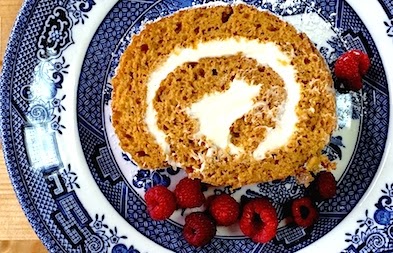
Pumpkin Roll Time!
A dear friend recently asked me about preventing pumpkin rolls from cracking after rolling, and I had to admit that I had never made one. So… I decided to take out the can of Libby’s pumpkin in my pantry and try the recipe on the inside of the label. I made a few changes, but pretty much left it the same. I weighed the flour after measuring, just in case there were any problems. This way, I would know exactly what amount was used and be able to adjust accordingly. Below are the results. Hope it helps when you’re making your pumpkin roll!
Preparing the pan: The original recipe suggests greasing a 15 by 10 inch jelly-roll pan, lining it with wax paper, then greasing again and flouring. I sprayed with non-stick pray, lined with parchment paper and sprayed again and floured, tapping out the excess flour. I was lazy and used a smaller piece of parchment paper that I already had on hand and the cake stuck where there was no paper- so make sure your paper covers the whole bottom of the pan!
Cake Recipe:
3/4 cup all purpose flour (by weight 3.5 oz.)
1/2 teaspoon baking powder
1/2 teaspoon baking soda
1/2 teaspoon cinnamon
dash of nutmeg (original recipe called for 1/2 teaspoon ground cloves)
1/4 teaspoon salt
3 large eggs (the size of the eggs do matter)
1 cup sugar
2/3 cup pumpkin (being the recipe on the Libby’s can, it of course calls for their pumpkin)
My Method:
1) Sift together the first 6 ingredients and set aside.
2) Place the eggs in a metal or glass mixing bowl and set in a very-warm water bath. This can be a larger bowl or pot half filled with warm water. Stir the eggs until they are lukewarm or at least the chill has come off of them. (Eggs will whip up nicer when they are warm.) Take out of the water bath, add the sugar and whip until the mixture is a pale yellow and leaves a trail when you lift the beaters. See video below (20 seconds long). Add the pumpkin and mix in.
3) The rest I do by hand, so that the gluten won’t get over developed (which will make your cake tough and holey). Using a spatula, fold the flour mixture into the egg/pumpkin batter, mixing only until the ingredients are incorporated.
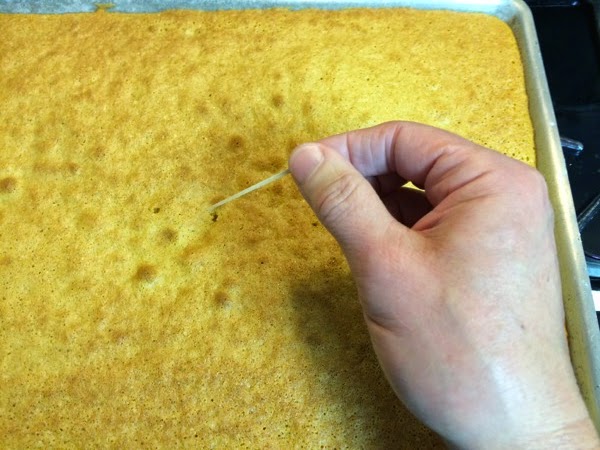 |
| Testing for doneness. |
4) Empty the batter into the prepared pan, gently spreading to the edges of the pan. Bake at 375F for 13-15 minutes. A toothpick inserted into the center should come out clean. Note: If your oven temperature is off, it can really effect the outcome of this type of cake. If you have to bake much longer, the cake could dry out as it is cooking. If you suspect your oven temperature may not be correct, test it with an oven thermometer and adjust accordingly.
5) While cake is baking, prepare a clean lint-free kitchen towel for the rolling. Liberally sprinkle powdered sugar on the towel on a clean dry surface. Also have a cake rack ready. (In the picture, I’m actually using an old roasting pan rack.)
6) After removing cake from oven, looses the edges by running a knife to free the cake from the sides of the pan (if necessary). Some people like to use plastic knives for this, so they don’t scratch their pans, but I just try to be careful and not scrape the knife on the bottom of the pan.
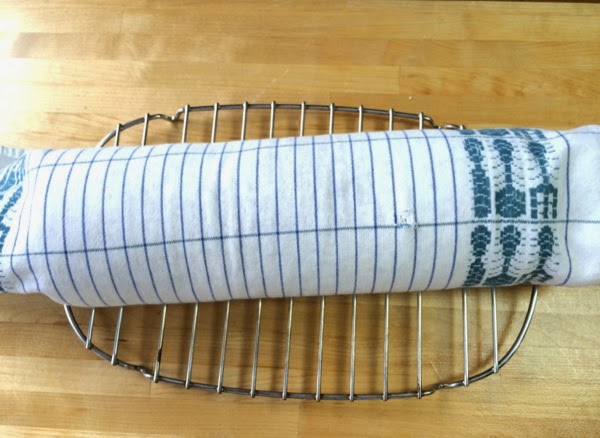 |
| Cooling on rack. |
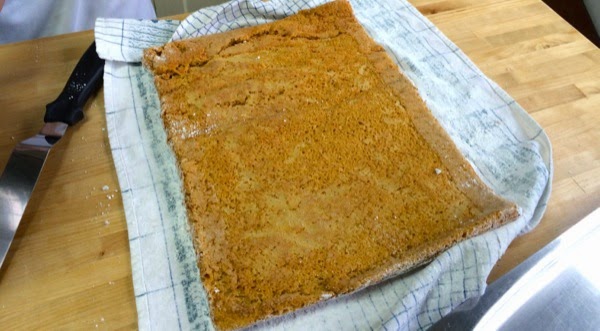
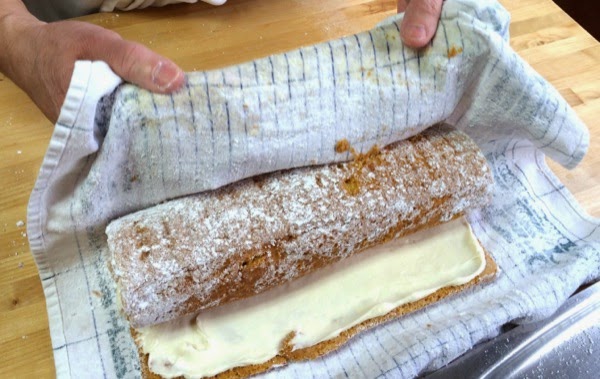
7) Turn the pan upside down on the prepared towel to release the cake from the pan. Carefully roll up using the towel to help. Place the rolled cake on a rack to cool.
8) When cake is just about cooled (I put mine in the fridge to speed things up), prepare filling.
Filling Recipe:
8 oz. package cream cheese, softened
1 cup powdered sugar (original recipe said to sift, but I didn’t)
6 tablespoons butter, softened (original recipe said butter or margarine, but please…)
1 teaspoon vanilla extract
Extra powdered sugar for the top
Method:
1) I softened the cream cheese (Trader Joe’s) and butter by placing them on a plate and very carefully microwaving at 15 second intervals until soft.
2) Beat the cream cheese and powdered sugar until creamy and add vanilla. I use the paddle attachment on the Kitchen-aid stand mixer and whip until fluffy. (original recipe says beat until smooth)
Put it all together:
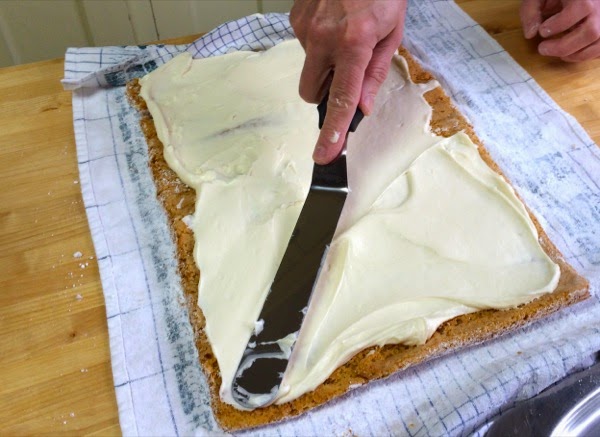
1) Carefully unroll the cake and spread the filling gently going all the way to the edges.
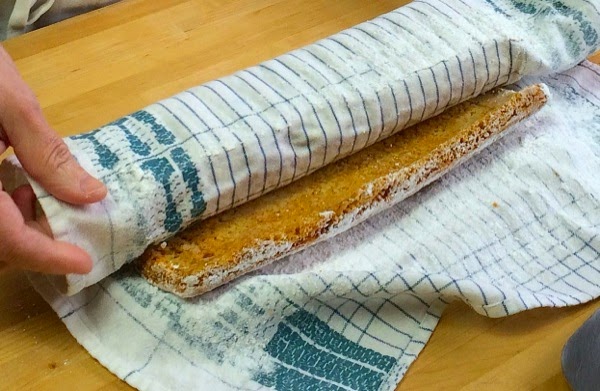 |
| Unrolling |
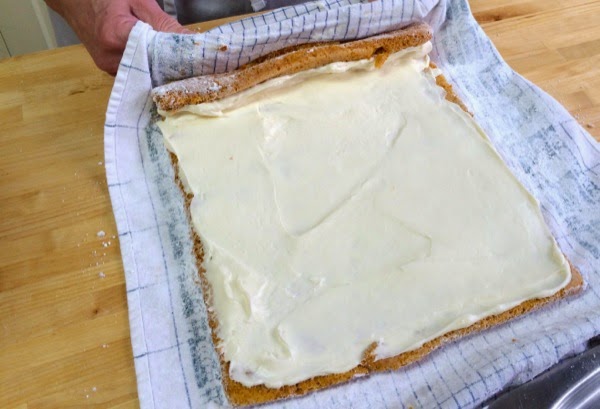
 |
| Unrolled cake ready to fill. Can see the damage at the top of pic from not lining my pan to the edges, but you can’t tell in the finished product. |
 |
|||
| Spread filling to the edges. |
2) Gently roll the cake back up, using the towel to help.
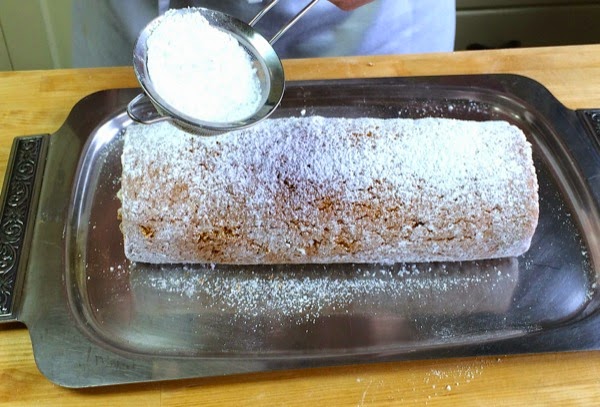
3) Then gently escort it onto your platter before sprinkling with powdered sugar. (The original recipe says to wrap the cake with plastic wrap and chill before serving, which would make the filling firm, but I just sliced mine right away.) Eat cake!!
 |
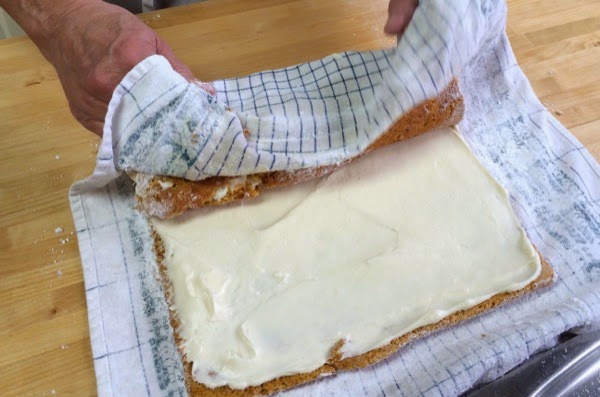 |
| Begin the roll | Keep rolling |
 |
 |
| You don’t even need to touch the cake. Let the towel work for you. |
Transfer cake to platter |
 |
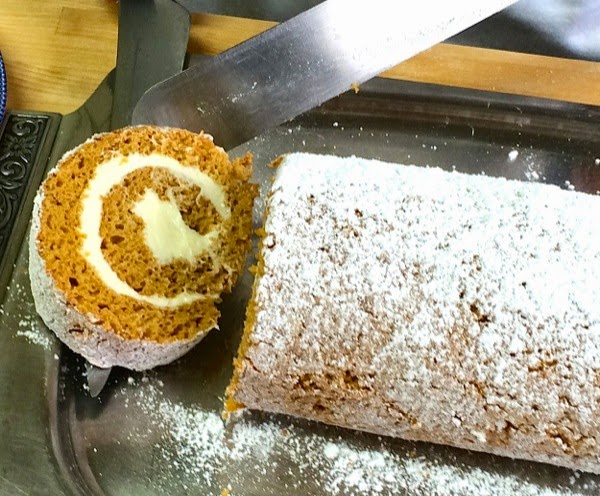 |
| Sprinkle with sifted powdered sugar | Slice with a thin sharp knife and serve! |
Homemade Proof Box for Croissants (and other breads)
 |
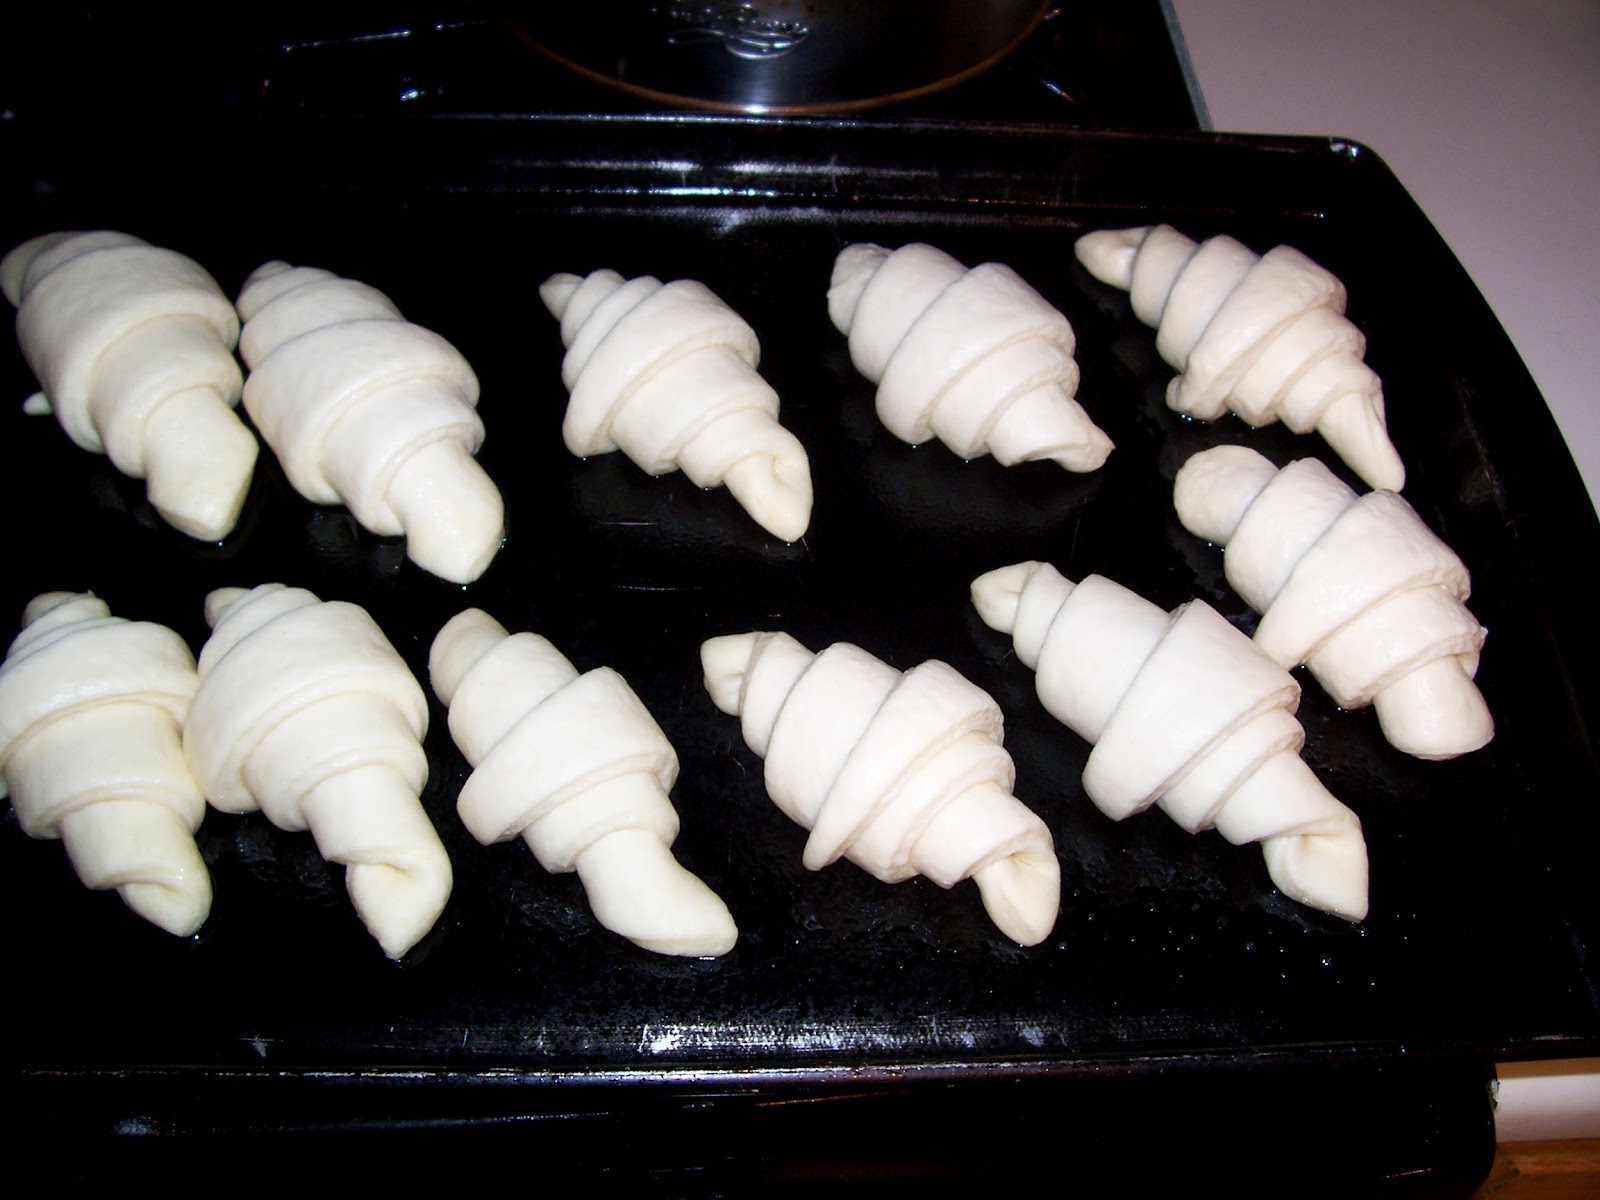
| My croissants after using my new proofer! |
It’s always been a challenge proofing (the final rise before baking) home made croissants. The butter that is encased in the dough will melt if the croissants get too warm (above 90F). Unfortunately, in my cool kitchen, the croissants take forever to rise and can get dried out during the process even when covered. Also, a cold croissant, even if proofed sufficiently, may not get as good an oven rise as one that is 80-90 F throughout. In a commercial setting, bakers have a proofing cabinet available to keep humidity and temperature under control. I have tried for years to come up with a home solution that was inexpensive, easy to use and not too risky (like using my oven as a proof box). Today, I was quite excited to have come up with the best solution so far.
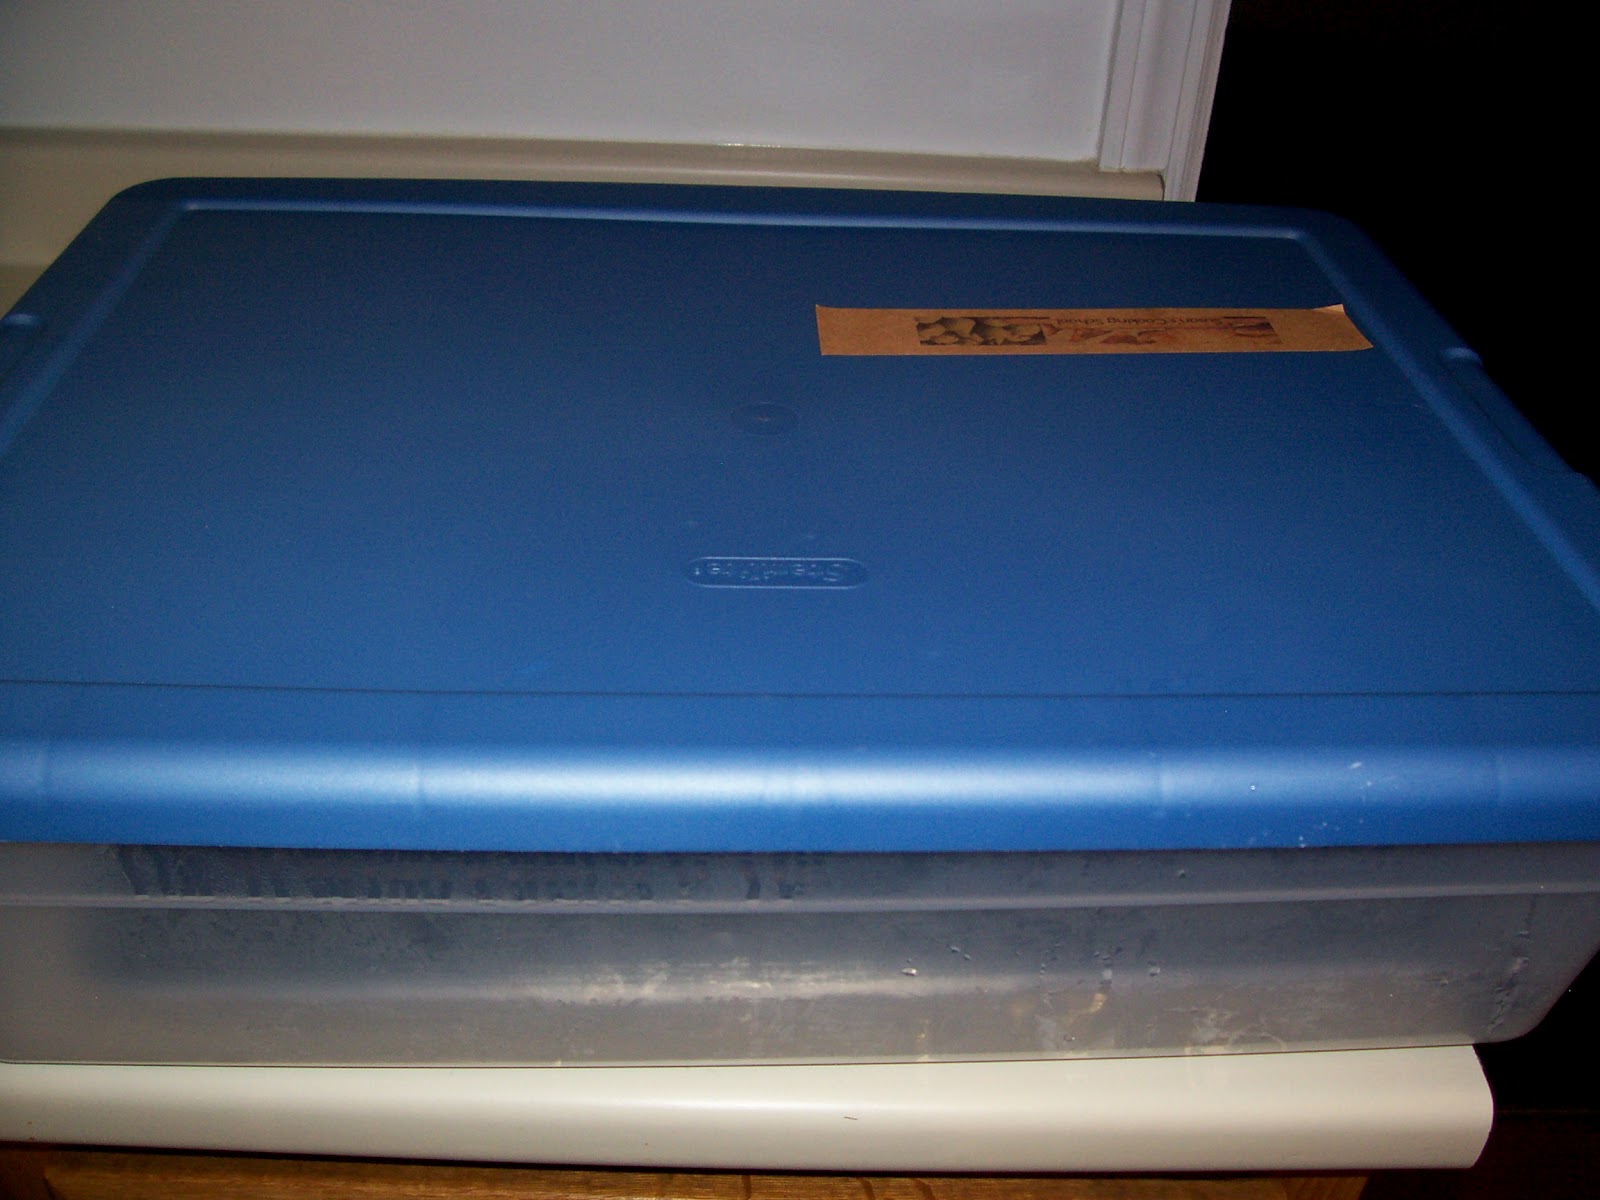 |
| 28 quart Sterilite container – proof box |
I tried two different containers for my proof box; a 28 quart Sterilite bin with a cover and a metal chafing pan with a domed lid. They both worked fine, but the plastic container is larger, lighter and cheaper, so that’s the one I’m going to show you. I placed it on a hot pad, put a half sheet pan inside and filled the pan with about a half of an inch of hot water. Then I placed a baking rack over the water on the sheet pan and put my tray of croissants on the rack to proof. Then the lid went on and about 30 minutes later the croissants were ready to be baked! The temperature was monitored with a probe thermometer. I used boiling water, which made the proofing environment at little too hot at first, but after a while it cooled down enough so that the butter was safe from melting. Even thought the temperature was too warm, the croissants rose and were ready for baking, before the butter had a chance to melt. I suppose the internal temperature of the croissant was not as high as the ambient temperature of the bin. I was quite happy with the results – The proofing time was short and the croissants stayed intact and baked beautifully!
 |
| Croissants proofing on a rack over hot water in a pan in a plastic bin. |
 |
| Before egg glaze and baking. |
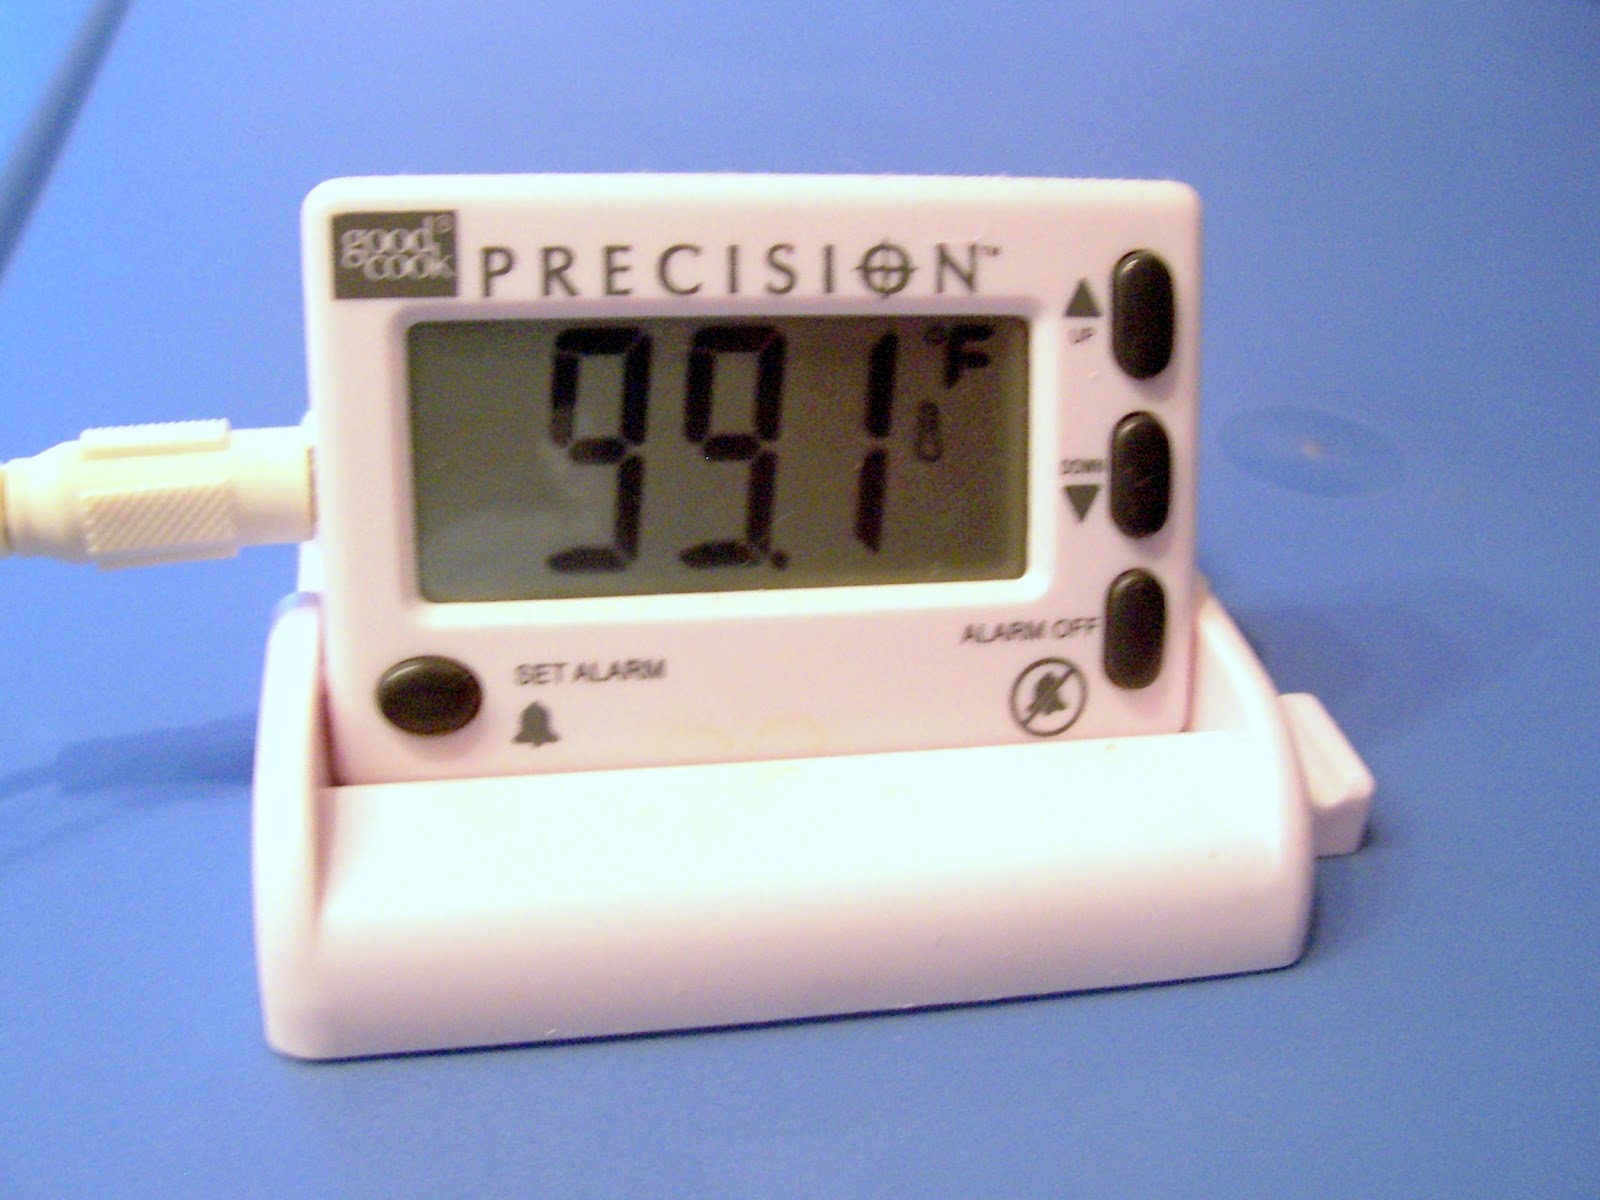 |
| Thermometer showing that the temperature was a little too warm at first. Between 90-95 would be best. |
For more info on making croissants, please check out the video above and/or my croissant recipe page. Happy baking!
French Bread FAQs
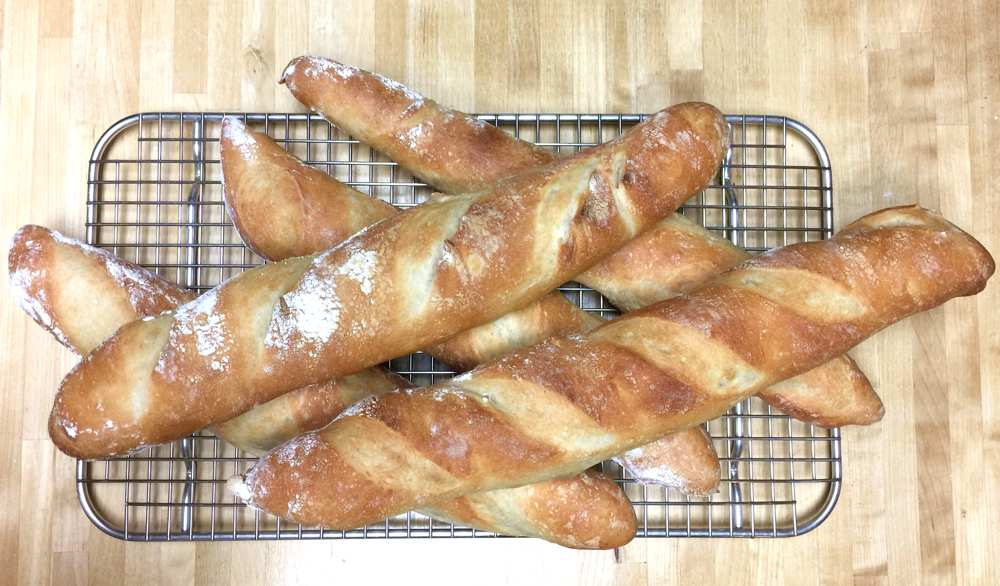
I get many questions regarding my video and recipe on how to make French bread. I have posted some of them below. This article will be a work in progress as I intend to regularly add information to it.
Please keep in mind that some things are difficult to learn online and that I hope some of you reading this will have the opportunity to learn in person how to make French Bread and many other complicated foods in a live setting. I would suggest making pizza out of my pizza dough before attempting French bread as it will be less frustrating, but still delicious!
Please check my articles on How Long Does It Take Dough To Rise and Pizza Dough FAQS for more useful information on making yeast doughs.
How do you create steam in the oven?
I keep an old metal pan on the bottom of my oven. It’s actually a baking pan from a previously used toaster oven. I have used an old cookie sheet, too. The pan will not be usable for any thing else once you use it for making steam. I let the pan preheat in the oven along with my stone. As a matter of fact, I just leave mine in the oven all of the time. When the loaves are ready to bake, I place them on the stone and quickly pour about 1/2 cup boiling hot water into the pan which creates a bunch of steam. I then immediately close the oven door. The steam helps the loaves to rise more in the oven and aids in crust development. This may or may not be a good idea in your home oven. I would not recommend this method if you have an electric oven, as there as there are electric elements on the floor of the oven. With an electric oven, it may work to place the pan on a rack below your stone. Please use caution and remember that the steam is very hot! Also, keep in mind that you are putting a lot of moisture in your oven that could cause things to rust. Please use this method at your own risk.
Can the sponge be proofed for a longer time, perhaps overnight?
Yes, you can ferment the sponge longer. You can use less yeast or for a slower ferment or place the sponge in a cooler location or a combination of both methods. Keep in mind that a long fermentation may create a sort of sour dough – it can be delicious, but a little different. You may need to experiment to find what works best for you. My recipe is a good one to play around with since some new yeast and food is put into the dough after the initial fermentation.
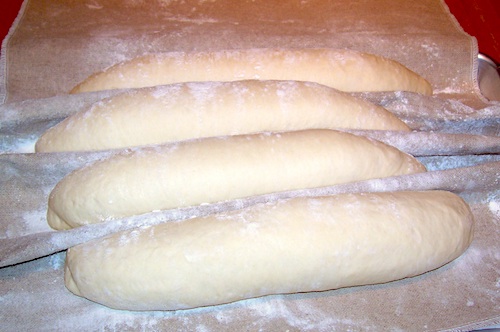
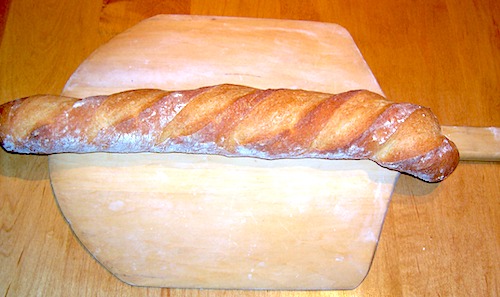
What about the cloth (baker’s couche) that you use to proof the loaves of bread before baking?
This material is 100% untreated, unbleached linen (made from flax fibers). I purchased mine from King Arthur Flour, but it came with raw edges that were unraveling a bit, so hemmed it (actually my Mom did the sewing) with a serger sewing machine. It is not supposed to be washed as the material will lose it’s natural non-stick properties therefor, it should only be used for leans doughs (no fat, dairy or eggs). I have experimented with duck cotton canvas that I purchased at a fabric store. It works fairly well and can be washed, but it is not as stiff as the couche and you may need to use more flour to prevent sticking.
The purpose of proofing the breads this way is that the fabric gently holds the dough in the baguette shape, allowing it to rise upwards, rather than spreading out. The natural oils in the couche also help prevent the dough from drying out, however I often put a sheet of plastic over the dough to give it extra protection. If you want to simulate a couche without spending any money, I have had luck using an old, clean cotton tablecloth, double or quadruple folded for sturdiness.
Why doesn’t my French bread come out like yours?
It is impossible for me to completely address this question in a virtual world. While French bread is made from simple ingredients, the process of making, shaping and baking the dough has many places where mistakes can be made. The most difficult part of bread making for most of my students is in the proper shaping of the dough, especially the need to make the loaves nice and tight before their final proofing. It may take some time to get the technique down, so keep trying and be patient. After all, bread isn’t that expensive to make, so practice away! In addition, French bread is one of the more difficult breads to make, because is is made with a very lean dough – a dough containing no fat. A lean dough has a tendency to quickly form a crust in the oven, preventing the bread from achieving “oven spring or rise” giving lightness and a lovely crust to the bread. Following all of the steps properly will help.
Can I refrigerate the shaped loaves and bake the following day?
Once the dough has been shaped into loaves, it is best to proof and bake right away. If you want to bake on the following day, store the dough in the refrigerator after it has risen (after Step 5 – recipe on my web site). For the overnight method, don’t let the dough rise until fully doubled in volume, because it may get over fermented. It will continue rising in the refrigerator, only more slowly.
Can I use instant yeast or fresh yeast instead of active dry yeast?
You can use fresh yeast, about .25 ounces (about 1.25 teaspoons or 6 ml) each for the sponge and then the dough (total of 0.5 ounces). Instant yeast would be OK, but it is usually the fast rising kind which I don’t like. Fast is not better when it comes to French bread.
Why don’t you use oil in your dough?
Oil will change the texture of the bread (especially the crust) and is not a traditional component of French Bread. You do not need to coat the bowl with oil before placing the dough to rise. It’s actually beneficial for the dough to be able to grab onto the sides of the bowl when expanding. It’s easier to make breads that contain oil, because the dough’s surface doesn’t dry out as quickly in the oven. If you’re making French Bread at home- you’re not into “easy” to begin with, right?
How can I stop my bread from drying out quickly?
I always bag and freeze all but the loaves that we’re going to eat right away. Lean breads, like French bread, tend to dry out quickly. You can freshen them up by heating in a 350-400F oven. They’ll get crispy on the outside with a moist interior.
Happy Baking!
Class Update
Classes for the Fall of 2008 are almost completely filled. We are hoping to open another section of our Holiday Dinner class on December 9th. Please let me know if you are interested and contact: Susan Sady. Leave your name, e-mail and/or telephone number. Thank you for your interest in Susan’s Cooking School.