Posted on

A Visit to Quebec City

We just got back from a lovely few days in Quebec City. Being a foodaholic, just about every thing we did, concerned eating.

We picked a quaint bed and breakfast place to stay in, Château des Tourelles at
212 rue St-Jean -one reason being that they served a great homemade breakfast every morning.

Dariusz out in front of Château des Tourelles

The dining room- Château des Tourelles

One of their delicious breakfast choices with wonderful homemade preserves! (Château des Tourelles)

While there, I fell in love with the bakery-cafe, Paillard (Café-boulangerie Paillard), 1097, rue Saint-Jean -conveniently on the same street we stayed on, but within the walls of the old city.  I’ll just let the pictures speak for themselves….

Paillard – Mouth watering breads

Paillard – More mouth watering breads!

Paillard – A delicious warm beef and blue cheese sandwich
 with cauliflower soup.

There is also a large and gorgeous Farmer’s Market, Marche du Vieux-Port de Quebec, where I saw the most beautiful leeks that I have ever seen. If only I had access to a pot and stove!

Beautiful veggies and fruits at the Farmer’s Market.
Just look at those leeks!
Posted on

Susan’s Cooking School at the 2014 NYS Fair!

On August 28, 2014 at 12:30 pm, Susan’s Cooking School will be cooking in the Wegman’s Demonstration Kitchen in the bottom level of the Art & Home Center at the New York State Fair. All food demonstrations are free and open to the public!

This year, Dariusz and I will be making panko breaded chicken cutlets, with fresh plum sauce and jasmine rice pilaf! All attendees will receive a free recipe and be eligible for several door prizes. In addition to all of that – the seating area is air conditioned, which for those of you that been at the fair in late August, know is quite a blessing.

After the demonstration, there is a question and answer period -so come and ask away! My goal is that after the demo, you’ll be able to prepare this absolutely wonderful meal at home for you and your family!

 
A little video about us at the fair!

Hope to see everyone there and please be sure to come up and say “hello” after the show!

Posted on

New videos and recipes!

Pizza for Two Video

I’ve uploaded a couple of great videos and recipes lately and I’d like to tell you about them.

Pizza For Two originally started out as a video to teach kids how to make pizza, but as I began the process, I realized that adults would be necessary to guide the children and what I was really doing was just making a real simple, straight forward small quantity of pizza. I tried using all purpose flour, because I always get asked about bread flour being necessary to make pizza dough. Since these pizzas are just stretched right on the sheet pan, I felt that all purpose flour would work sufficiently well. Truth is that the pizzas that I made with all purpose flour were OK, but the dough was very sticky and difficult to knead and when that happens, people get frustrated and start to add too much flour to the dough. So…I recommend bread flour, if you can get it. The surprising thing to me was, that I used to always make a large batch of traditional pizza dough, but I fell in love with my new quick method and find myself using it all of the time.  Hope it becomes your favorite as well!


Another recent video upload and recipe is Olive Rosemary Bread With Sea Salt. This bread was inspired by my many visits to the Wegman’s (Dewitt, NY) bakery, where I would buy their olive bread and rosemary olive oil loaf.  Mine sort of combines the two. Their breads are great, but you can make these beautiful loaves at home for a fraction of the cost. Saving money is not the main reason that I make homemade breads, though. It’s a beautiful thing to pull your crackling olive bread loaves out of the oven, tear (or cut) off a piece and dunk it in some peppered extra virgin olive oil! This recipe and technique is a little more advanced than the Pizza For Two above, but it’s worth the effort! Please share your results with me and others on Facebook. Happy Baking!


Olive Rosemary Bread with Sea Salt
Posted on

Pastry Flour verses All Purpose Flour

I use pastry flour in many of my recipes, especially when making pie (pastry) dough. I often get asked if it’s really necessary to use pastry flour and if it’s OK to substitute all purpose flour instead. My answer is that if you can easily purchase pastry flour, then please give it a try!

The home baker has unfortunately been led to believe by most cookbooks that all purpose flour is for all purposes, but in reality, it is a flour that is blended to be sufficient for a variety of products, but not the best for most breads and pastries. Commercial bakeries rarely use all purpose flour, because they have a distinct flour for every baking purpose. Here are a couple of links to commercial bakery sources that will give you an idea of the products available to commercial bakers: North Dakota Mill and Progressive Baker. Of course, it’s not practical (or even possible) for the home baker to purchase a huge assortment or flours, but I do like to use a couple of specialty white wheat flours for use at home, namely, bread flour and pastry flour. Today’s article is about the latter.

My pastry flour: Maple Leaf Pastry Flour

Pastry flour is an unbleached low protein flour used for cookies and pastries. The protein in the flour is what forms gluten when combined with water (or other water-containing liquids) and mixed or kneaded. The more the dough or batter is mixed, the more gluten strands are developed, producing a stronger dough. Generally speaking, when making yeast breads, you want to develop a strong dough and therefore will use a flour high in protein. For a flaky, tender pie dough and light crispy cookies, pastry flour is called for. We are fortunate in Utica, NY in being able to purchase good quality, inexpensive (around $4 for a 5 lb. bag) Maple Leaf Pastry Flour at a few area grocers: Chanatry’s, Price Chopper and Broad Street Cash and Carry (Avico Spice). King Arthur also has an unbleached cake/pastry flour available, but it’s much more expensive. Don’t use bleached cake flour as a substitute for pastry flour.

A big advantage of using pastry flour is that if you accidentally over mix, there is not as much gluten to have to worry about getting overdeveloped. When making pie dough with all purpose flour, you have to be very careful, as it can get over worked very easily, causing your pie crust to spring back when rolling and/or shrink during baking, leading to a tough thick crust.

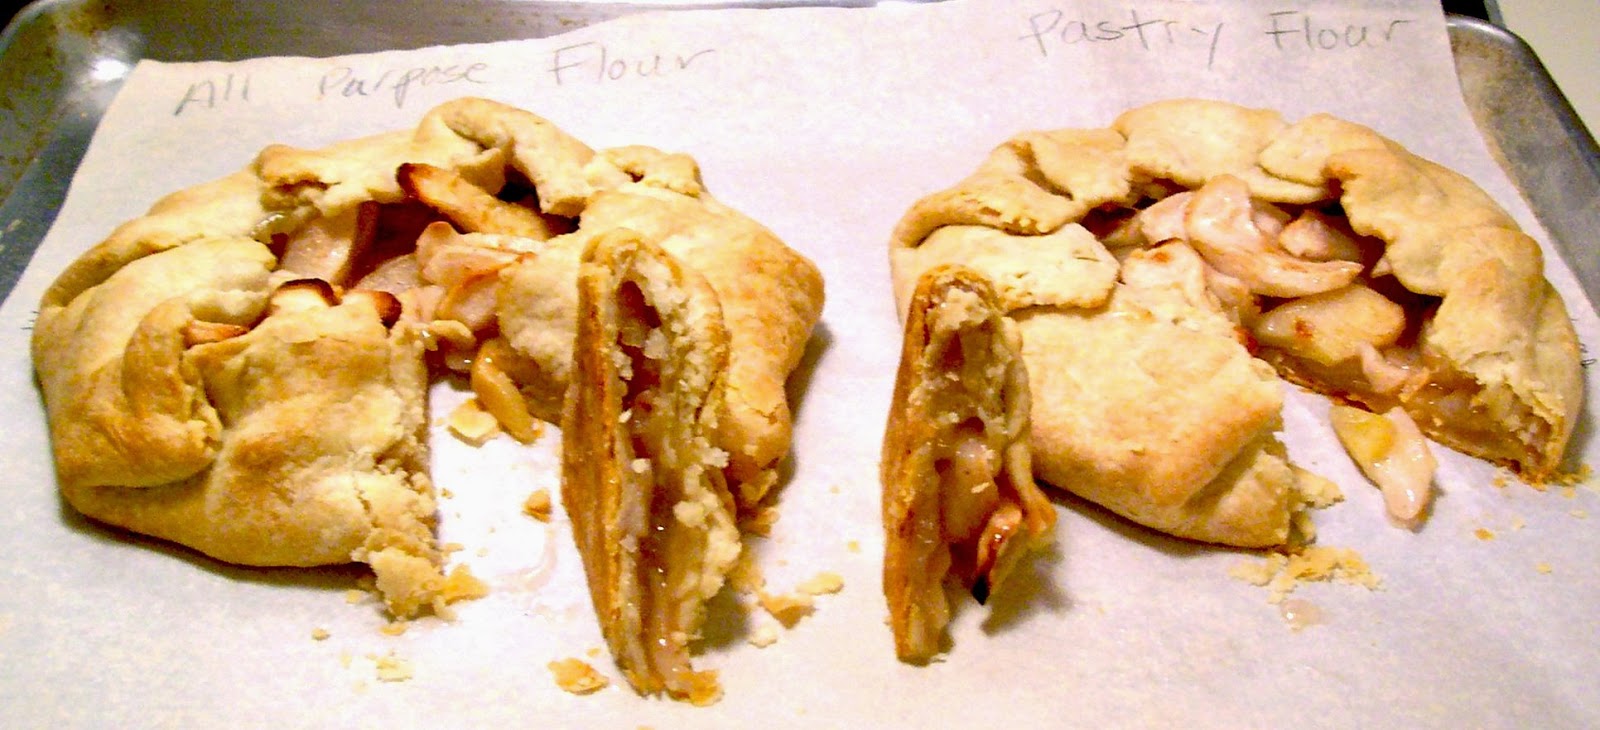
I am going to share with you my slightly scientific experiment to demonstrate the quality differences between using pasty flour and all purpose flour in a basic pastry crust.

The experiment:

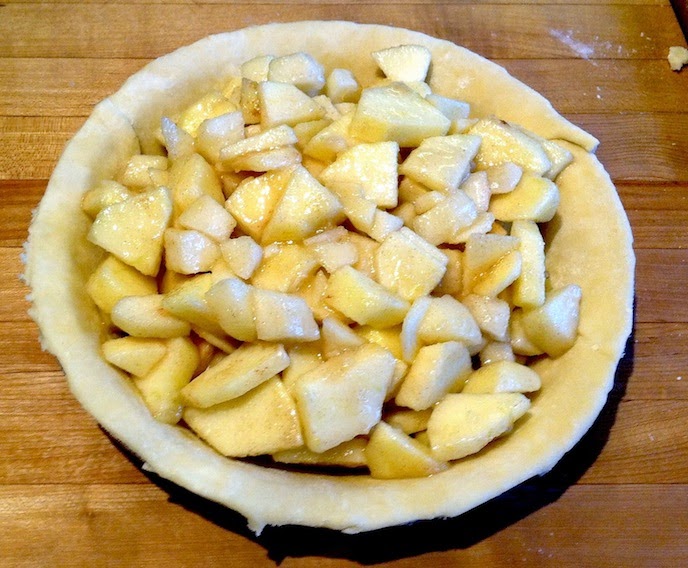
I made two batches of pastry dough, one with pastry flour and the other with all purpose flour. I then rolled the dough, and made identical apple crostatas out of each. Then baked and taste tested them both (the best part).
I weigh flour for greater accuracy, which is especially helpful with pastry flour. If you don’t have a scale, I give approximate volumetric measurements. For measuring the pastry flour without a scale, stir the flour and gently scoop into the measuring cup. Level the top with a flat edge. For all purpose flour, don’t stir before measuring. I highly suggest getting a kitchen digital scale -they are extremely inexpensive.

Video showing how to make the crostatas.

Crostata Pastry Dough Recipe

8 oz. (~1¾ cups) Pastry Flour(See note above in red) or 8 oz. All Purpose Flour(see note above in blue)
4 oz.  Cold Butter (1 stick or 8 tablespoons)
¼ cup Cold water

For complete instructions, filling recipe and video, please visit Susan’s Pie Crust and Apple Pear Pie page.

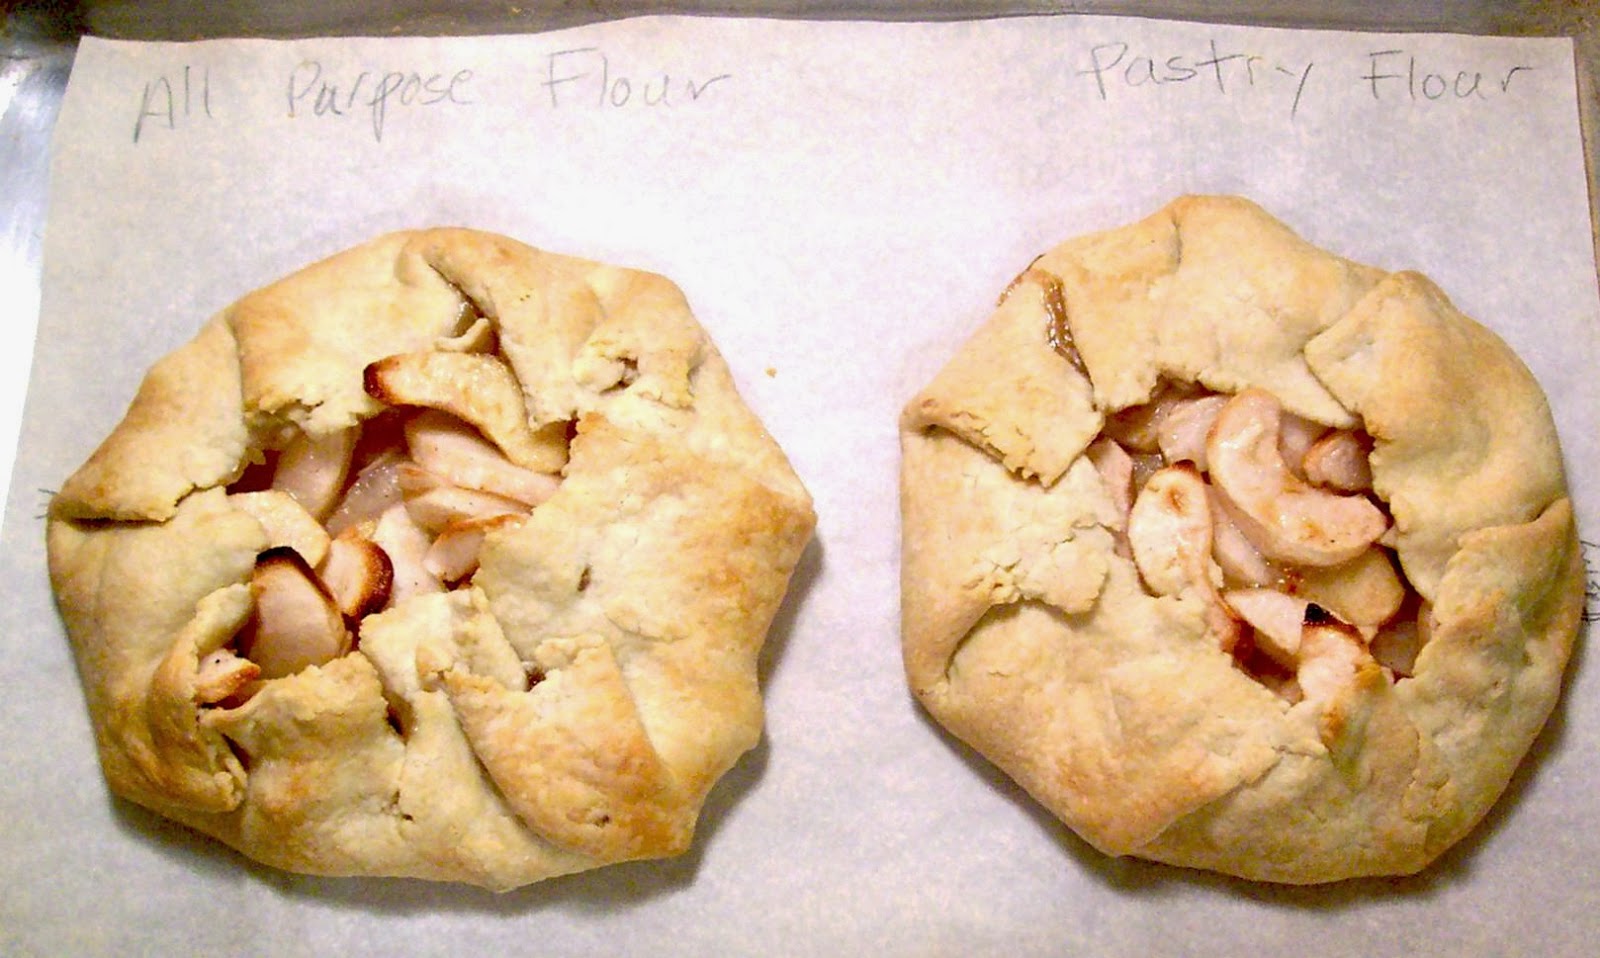
All Purpose Flour on left, Pastry Flour on right

Results

  1. The good news is that both of these were delicious. 
  2. It’s hard to tell from the pictures, but the one made with pastry flour was more tender, delicate and flaky. The one on the left (all purpose flour) was chewier but still quite acceptable.
  3. The pastry flour version was easier to roll out thin.
  4. The pastry flour crust had a softer bite and was enjoyable to eat with or without any filling attached.
  5. Bottom crust- no discernible differences.

Happy Baking!

Posted on

European Vacation: Polish Hot Chocolate, Oh My Goodness!

During our stay in Krakow last summer, we had the pleasure of visiting the E. Wedel cafe in the Galeria Krakowska. This visit had special meaning to my son (above), because he had an indelible memory of their superb hot chocolate from a visit to Warsaw as a teenager.

Of course, I needed to be able to replicate this fantastic hot chocolate.  I did some experimenting at home and the results were quite good. Click here for my Polish Hot Chocolate recipe and video.

We had the opportunity to serve this delicious chocolate beverage for Munson-Williams-Proctor Arts Institute’s annual Candlelight Tours of the Victorian Yuletide exhibition in the Fountain Elms period rooms.

Biscotti and Polish Hot Chocolate served after the Candlelight Tour
Inside the E. Wedel cafe looking out on the Galeria Mall in Krakow.

Server in the cafe

Cabinet of chocolate goodies!

As served: E. Wedel’s chocolate masterpiece!
Posted on

Speaking of Europe….

I just started doing a series on our Family European Vacation. Of course, the emphasis has been and will be on food. However, an observation concerning my other profession, that of musician, is that every where we traveled, there seemed to be a true appreciation for the arts, classical music included.
The wall of music greets you when you arrive in Vienna:

While in this beautiful city, we visited the Haus Der Musik, where they offered a free classical concert series on Sunday afternoons. It was only 45 minutes long and featured Bence Csaranko as violinist-moderator and Sugi Shin on piano. We arrived early and got good seats, but soon the place was filled to capacity. By the time the concert started, there were people sitting at our feet. They couldn’t even see the concert, only listen! There was a wonderful variety of people there, anxious to hear the brief, but interesting commentary and performances of these favorite Viennese composers; Strauss, Mozart and Beethoven.

I have decided to offer my own free music right here and now.
This is my recording of Chopin’s Nocturne in E-flat major, Op. 9, No. 2 performed on a Baldwin L. Hope you enjoy it. Feel free to download it and use it for non-commercial purposes.

 
Haus Der Musik: Before concert
During concert
Posted on

Our European Vacation – Part I: Sweden

This past summer, my husband, our two adult sons and I went to Europe together for a vacation that I never quite thought we could pull off – but we did and it was wonderful!  It was the vacation of my dreams, even though we spent most of our time walking and eating with a little shopping in between. I’d like to share with you some of my food related experiences – just little things that we noticed during our travels to Malmo (Sweden), Copenhagen (Denmark) Krakow (Poland) and Vienna (Austria).
To begin: Our Air Canada flight lands in Copenhagen and we take the Oresundtrain (or Øresundståg) to Malmo, Sweden. The train is new and clean and on time! Below is the Öresund Bridge linking Sweden and Denmark. Years ago, when we took this trip, you had to go by ferry or speed boat to get across!

One thing that struck me as we shopped and ate in Sweden was the variety and quantity of cheeses available. The hotel we stayed at served a lovely breakfast buffet…

(Let me just say that the pic below is not what I selected from the buffet)

… with a wonderful selection of cheeses. The breads everywhere were also very good, but maybe I’ll be nice and not talk about those mouth injuring crackery flat breads that are sold in great quantity at the Maxi Supermarket that we often visited.

Here are a few pictures of the amazing selection of cheeses in Maxi (right near where we stayed). Not only did the selection blow my mind, but some of the package sizes seemed incredibly large for non-commercial use!

More vacation stories to come!

Posted on

We’ll be at the NYS State Fair – Wegmans Demonstration Kitchen – August 29th, 2013

2012: Dariusz ricing potatoes -good job for a strong man

We are very excited to again be a part of the Wegmans’ Taste NY culinary demonstrations at the New York State Fair. They are held in their beautiful demonstration kitchen in the lower level of the Art and Home Center. Our demonstration will take place on Thursday, August 29th at 12:30 pm. Here’s a link to their schedule of demonstrations.

Last year, Dariusz and I demonstrated how to make pierogi.  It was a wonderful experience and we’re very happy to have been asked back again for the 2013 season!

2012: Showing how not to drop pierogi into boiling water!


This year we will be showing how to make a double crust Apple-Pear pie, one of my favorites. Most importantly, I will demonstrate how to make a perfect, tender and flaky pie crust from scratch. All attendees will receive a recipe and there are even door prizes handed out. All of this is free! (once you’re in the fair, of course)
Please come up to Dariusz and I after the show and say “hello”, whether we’ve met before or not. Hope to see you there!

For this year: Apple-Pear Pie before top crust is applied.
Baked Apple-Pear Pie!

Posted on

Polski Piknik Class

Our Spring-Summer 2013 schedule is now out and we’re very excited that one of our classes is going to be Polski Piknik on June, 29: 10am-1pm! We’ll be grilling some locally made Kielbasa with Dariusz’s special sauerkraut, grill/roasted potatoes, grilled red peppers, fresh grilled rye bread sticks, chicken paprika and a luscious sour cream dill sauce. For dessert, tender nalesniki (Polish style crepes) filled with a hazelnut spread and strawberry cream! It’s an incredible meal and one that you’ll want to make for your family after class. Hope you can join us!

Here’s a little preview:

Our brochure

Posted on 7 Comments

Baking With Fresh Yeast

First, a little info on active dry yeast…

Most of my yeast doughs are made using regular active dry yeast. It is quite inexpensive when purchased in one or two pound vacuum packed bags (see Red Star Yeast below) and lasts a long time. When I open a new bag, I transfer a portion to a recycled 4 oz. yeast jar for easier handling. The rest of the yeast, in its original container, goes into a plastic bag sealed with a twist tie. I store the jar and bag in the fridge. It lasts quite a long time, but if you see your dough taking longer and longer to rise, it may be time for a new purchase. Even if the bag is only half used, it’s still cheaper than buying in small quantities. However, I probably use more yeast than the average person.

Different types of baking yeast
Active Dry Yeast and Fresh (compressed) Yeast
Spinach bread rising in homemade proof box

Now, about fresh yeast…

Today’s article, however is on using fresh yeast, which I’ll refer to as either fresh or compressed. Unfortunately, it may be difficult for many to purchase good quality fresh compressed yeast, which has a very short shelf life. The kind that used to be available in the grocery stores (in my area) in one or two-ounce little foil blocks have just about disappeared and they weren’t very good to begin with. This yeast is not the same as commercially available block fresh yeast which doesn’t have added starch. I believe they added starch to grocery store yeast so that it could be proofed with the addition of just warm water -no added sugar or flour necessary. Of course, the yeast needs food, but you can add that yourself when you’re ready to use it.

The yeast used to make the dough for the bagels and spinach bread seen in the pictures here is  commercial compressed yeast, sometimes referred to as wet or fresh yeast. It comes in one-pound blocks, needs to be kept refrigerated, and is relatively inexpensive if you do enough baking to use the  majority of it before it goes bad. It can be difficult to ascertain the freshness when purchased in loose blocks, unlike a bakery or pizza place that may purchase a case. When fresh, the yeast should have a pleasant yeasty odor, and not foul or moldy. It shouldn’t be dry on the surface, but that is hard to tell because it is wrapped as you see in the picture. I get mine from a cash and carry supply store that sells wholesale and retail food supplies. You may have some luck trying to purchase it from a bakery or pizza place too. Here’s an online source, but it’s very expensive. I purchase it for under $2.00 a pound locally.

Now I’ll get to the part of why you would want to bother using fresh yeast. When it is truly fresh, it is the best and easiest stuff to use! I would recommend weighing the yeast, because unlike active dry yeast, which can be accurately measured by volume (with teaspoons, etc.), fresh yeast is crumbly and can only be measured approximately by volume. When substituting fresh for dry, I use about 1 oz. of compressed yeast in exchange for 1 tablespoon active dry yeast or .3 oz. fresh for one teaspoon dry. One ounce of the compressed yeast is about 1/4 cup fresh, compressed yeast, loosely crumbled.
The real advantage in using the fresh yeast is that for most bread and pizza doughs, you don’t need to dissolve or soften the yeast first. Just lightly crumble the yeast and add directly to the flour before adding your liquids, etc. That saves you a step and eliminates dirtying another bowl or cup for dissolving (softening) the yeast. This yeast is very alive and not dried out into little grains that need to be brought back to life.


 The recipe for the dough used in this video and pictures is very simple:

2 pounds of bread flour (about 7 cups)*
1 oz. fresh compressed yeast
1 tablespoon Kosher salt
19 fl.oz. warm water

  1. Combine all ingredients in a large mixer bowl and mix on speed one with a dough hook until the dough is formed. Continue to mix for 10 minutes more. You need a large stand mixer for this size batch, of at at least a 6 qt. capacity. For hand kneading,  just mix the dough by hand until the ingredients all come together and then knead for about 6-8 minutes. You can view my pizza dough video to see the hand kneading method in action.
  2. Allow the dough to rest in the bowl for 15-20 minutes, covered. Round the dough and cover again, allowing it to rise until double. This should take about 45 minutes to an hour and a half depending on your room temperature and the temperature of the dough. (see, How long does it take for the dough to rise?).
  3. The dough can now be divided and made into your desired products. Here is my bagel recipe and here is my Spinach Bread recipe. The spinach bread shown on this page are quite large. I used 4 oz. of dough for each!
Bagels baking on stone
Spinach Turnovers in the oven!
Ready to eat!