Posted on 2 Comments

Europe 2017! 1. Carrefour in Paris – Definitely not Walmart!

1.  Europe 2017 – Carrefour Hypermarket
This is the first of my articles relating to our European trip in July.  We visited Copenhagen, Berlin, Bremen, Amsterdam, Bruges, and our final destination, Paris. While there, I wanted to go to a large retail store and see what is was like and hopefully purchase some goodies to take home. We were traveling light and could not take too much with us, but I still had to get some more cooking things!

Looking online for a place to go, I read about the Carrefour chain and its hypermarket in Paris. This hypermarket was equated somewhat to our Walmart superstores. Of course, I had to go and see for myself.  When we first walked in, the non-food items were displayed near the entrance and they did resemble what you might see at a Walmart. However, when we got to the food section, oh my…Absolutely no comparison.

 
There were amazing breads, cheeses, meats, seafood and on and on. In the top picture is a crepe machine in the distance. In the video below you can see it automatically making huge delicious looking crepes (unfortunately, we didn’t try them). 


 I wish I could have brought home some different flours seen in the picture above, but flour is a bit heavy to travel with. I did, however, purchase many other culinary items and in future articles/videos, will be comparing and contrasting. Coming next up next: French yeast vs. Aldi.  Stay tuned…

Side note: One thing that I noticed in all the countries we visited in Europe, is that the ingredients listed on products appear to be more natural than those same products in the states. Especially when it comes to artificial food coloring. I’ve never understood why most pickles in the US have yellow food coloring in them. A topic for another article!

Posted on

“Can I Freeze Leftover Dough?”

This is one of the most frequent questions I get asked from YouTube viewers and students. Usually it refers to leftover pizza dough, but it can be about any yeast dough. My answer is that the freezer is not too friendly to living yeast and the dough will be rather lifeless after being thawed. I prefer to finish off all I’ve made made (although, I sometimes refrigerate some for use the next day) and then freeze the finished product. This is true with pizza and breads.

Two rounded pieces of dough
Freshly made dough

For example, a couple of weeks ago we did some backyard grilling and I made one of my all-time favorites, grilled flat bread. It can be made with almost any lean dough (one that doesn’t have too much sugar or fat) and is super easy and fast. The charcoal was a bit too hot since my husband decided to throw on some wood clippings from our pear tree, so they sure cooked fast! Some a little too fast. They were delicious and we ate a bunch with dinner. The leftovers were frozen in a plastic bag.  To reheat, I just pop them in the toaster oven (watch closely) and enjoy nice hot flat breads. I’ve even warmed them over my gas burner. You can also microwave to thaw first -very briefly.

Bread on the grill
On the grill

Today, I needed to make a quick lunch and there wasn’t too much going on in the fridge, so I took out a couple of breads, defrosted them in the microwave, topped with a little olive oil, fresh tomato and provolone cheese.

Open faced sandwiches
Ready for the toaster oven

Popped them into the toaster oven and voilà, I had a nice hot lunch with a flavor reminiscent of the fresh made flat breads! Here’s the recipe.

Sandwich and salad
Super quick and tasty lunch!
Posted on

Mini tarts made easier and better!

I had some left over pastry/pie dough in the fridge and wanted to use it up, but didn’t feel like rolling out dough. Because I make my pie dough with butter, (recipe) it gets extremely hard when cold. So…I decided in my moment of laziness to try something new.  I just chopped up some fruit (apples, pears and plums) into small oven proof bowls, added some sugar, cinnamon, flour and lemon zest (didn’t measure) and gently mixed with a spoon. Then I thinly sliced my pie dough into disks and placed it on top of the fruit. Baked at 400F until bubbly. Didn’t time it, but I think it took around 30 minutes. They were so good that I thought I would share. 
Happy Baking!

Posted on

Proofing Yeast: What does it mean & Do I need to do it?

I often get asked about the necessity of proofing yeast, how should the yeast look, how long should it take, what if the yeast doesn’t get foamy, etc, etc… I would like to answer some of those questions here. My most watched video on YouTube is How to Make Pizza Dough, and in that video I show how to proof active dry yeast. I’d like to go over some of the many concerns and questions involving this step.
First, let me talk about the yeast. I would prefer to use beautiful, natural fresh (cake) yeast for baking breads and pizzas, but that is quite impractical for home baker as it doesn’t stay fresh long, comes in 1 lb. blocks and is not usually found in grocery stores. The cake yeast that was available for the home baker and sold in grocery stores (I don’t know if it still is) is not the same as commercial cake (fresh) yeast.  The commercial yeast has no starch or sugar in it, whereas the home version did. The advantage of using fresh yeast is that it can usually be incorporated directly into the dough ingredients without softening or dissolving first and has no additives.
This leads me to the next subject about additives. I prefer to use yeast that has nothing else added to it. You can see in the picture below that the yeast used for this demo is from Aldi and the only ingredient is yeast.

Natural active dry yeast usually needs to be softened in liquid before use. Many of the instant and/or quick rising yeasts do not need to be pre-softened and can be added directly to the rest of the ingredients. Many bakers and many websites swear by these instant yeasts. I am not one of them. They usually contain Sorbitan monostearate and sometimes, ascorbic acid. An explanation of why Sorbitan monostearate is used is found on this Red Star yeast FAQs page. Let me just say that I find the quality of the dough and texture of the crumb better when made with regular active dry yeast.
So why proof the yeast? You don’t have to, but it will show you that the yeast is alive and well and also gives it a nice kick start before being added to the dough. If you don’t add sugar (and sometimes I don’t-depending on the recipe), it won’t foam, but the softening is important to help the yeast to develop and grow once it gets some food, such as found in flour.

Here is a picture of 1 packet (~2 teaspoons) of Aldi regular active dry yeast (above) gently stirred into 1/2 cup warm spring water with 1 teaspoon of sugar and allowed to rest 10-15 minutes. Yours may not look like this for several reasons. Here are a few:
1) Your yeast may not be fresh enough, even though the “use by” date may be valid.
2) The water may be too cool or too hot. Temperature should be between 90-110F.
3) Your water may have things like chlorine or excessive hardness, etc, that can affect yeast growth.
4) A different brand yeast may soften and/or grow at a different rate than the yeast above.

In closing, even if your yeast seems sluggish, it may still work perfectly fine. It has happened to me many times. However, I have had to throw out yeast, especially bulk active dry yeast, that just seemed to lose its strength. When yeast gets old, it not only becomes sluggish, it can affect the quality of the dough.
Hope that answers some questions. Happy Baking!

Posted on

Oneida County Public Market

Just had an enjoyable visit to the Oneida County Public Market. They’re open Saturdays from 9am to 1pm.

Iron Hoof Farm (I bought leeks)

Everything looked beautiful, the prices were fair, and the vendors were friendly.

My take home

Fresh little red potatoes, sweet onions, red ripe tomatoes, purple peppers, and some other type of pepper that I forgot the name of. An extra treat – Utica Bread was there too! This crusty, sesame seeded loaf has incredible flavor and an airy inner texture -one of my favorites!

Posted on

Homemade Tortillas Chips

Homemade tortillas chips taste so good and are super easy to make. The only problem is, you won’t be able to stop eating them!

Slice corn tortillas into quarters or whatever size you like.

Fry several at a time in medium hot veggie oil (canola is good). I don’t usually use a frying thermometer, but the temperature of the oil is probably 350-375 F.

Drain them on a rack.

Put them on paper towel and season with your favorite spices! Serve with your favorite salsa!
Store leftovers in a sealed plastic bag or container.

Posted on

How To Make Pierogi

I’m happy to announce that my How To Make Pierogi DVD is now available at Amazon.com for only $9.50. This DVD is the perfect gift for anyone who likes to cook and eat, especially Polish food.

How To Make Pierogi DVD

As the owner of Susan’s Cooking School and former owner of Polonaise Restaurant, I share all my secrets and tips on how to make the perfect pierogi dough and two delicious fillings: Potato & Cheese and Sauerkraut & Mushroom! Step by step instructions will guide you in every step of the process, including how to roll out the dough, cut the circles, fill and boil. Sautéing and presentation are also included.

 Happy Cooking!

Posted on

German Week at Aldi

Recently, it was German Week at Aldi. Being a German based company, they often carry German made products, but during German week they have quite a few extra special food items. Many of their German products are great quality, especially the chocolate kind (which, fortunately, they have year round). I just wanted to share with you a quick, delicious meal made with Aldi’s Bavarian Bratwurst, German Style Sauerkraut, Bavarian Sweet Mustard and fresh apples.  Ingredient quantities are flexible.

    Bavarian Bratwurst with Sauerkraut and Apples

    1. In a fry pan over medium heat, saute about ½ cup chopped yellow onion in 1-2 tablespoons vegetable or olive oil, until tender and just starting to brown.
    2. Add 2 small apples, cut into chunks  and continue to cook for about 2 minutes.
    3. Stir in 1 cup of packed sauerkraut that the juice has been squeezed out of.
    4. Add 2 bratwurst and cover.  Simmer for about 5 minutes or until the bratwurst is hot throughout.
    5. Serve with Aldi’s Bavarian Sweet Mustard! Delish! We had it with sweet mashed potatoes – while not traditional, it was real good.
    Posted on

    Pumpkin Roll Time!

    A dear friend recently asked me about preventing pumpkin rolls from cracking after rolling, and I had to admit that I had never made one. So… I decided to take out the can of Libby’s pumpkin in my pantry and try the recipe on the inside of the label. I made a few changes, but pretty much left it the same. I weighed the flour after measuring, just in case there were any problems. This way,  I would know exactly what amount was used and be able to adjust accordingly. Below are the results. Hope it helps when you’re making your pumpkin roll!

    Preparing the pan: The original recipe suggests greasing a 15 by 10 inch jelly-roll pan, lining it with wax paper, then greasing again and flouring. I sprayed with non-stick pray, lined with parchment paper and sprayed again and floured, tapping out the excess flour. I was lazy and used a smaller piece of parchment paper that I already had on hand and the cake stuck where there was no paper- so make sure your paper covers the whole bottom of the pan!

    Cake Recipe:
    3/4 cup all purpose flour (by weight 3.5 oz.)
    1/2 teaspoon baking powder
    1/2 teaspoon baking soda
    1/2 teaspoon cinnamon
    dash of nutmeg (original recipe called for 1/2 teaspoon ground cloves)
    1/4 teaspoon salt
    3 large eggs (the size of the eggs do matter)
    1 cup sugar
    2/3 cup pumpkin (being the recipe on the Libby’s can, it of course calls for their pumpkin)

    My Method:
    1) Sift together the first 6 ingredients and set aside.
    2) Place the eggs in a metal or glass mixing bowl and set in a very-warm water bath. This can be a larger bowl or pot half filled with warm water. Stir the eggs until they are lukewarm or at least the chill has come off of them. (Eggs will whip up nicer when they are warm.) Take out of the water bath, add the sugar and whip until the mixture is a pale yellow and leaves a trail when you lift the beaters. See video below (20 seconds long). Add the pumpkin and mix in.

    3) The rest I do by hand, so that the gluten won’t get over developed (which will make your cake tough and holey). Using a spatula, fold the flour mixture into the egg/pumpkin batter, mixing only until the ingredients are incorporated.

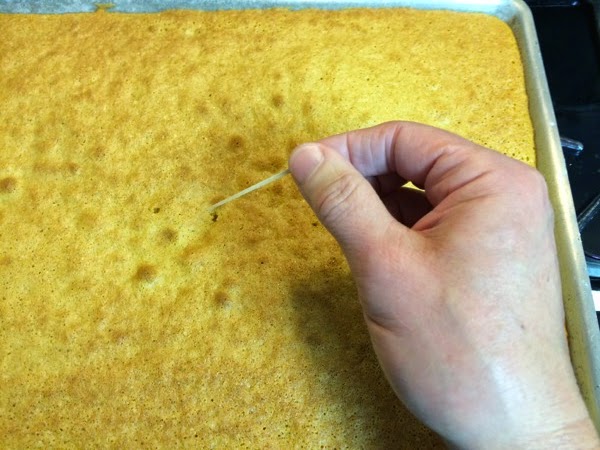
    Testing for doneness.

    4) Empty the batter into the prepared pan, gently spreading to the edges of the pan. Bake at 375F for 13-15 minutes. A toothpick inserted into the center should come out clean. Note: If your oven temperature is off, it can really effect the outcome of this type of cake. If you have to bake much longer, the cake could dry out as it is cooking. If you suspect your oven temperature may not be correct, test it with an oven thermometer and adjust accordingly.

    5) While cake is baking, prepare a clean lint-free kitchen towel for the rolling. Liberally sprinkle powdered sugar on the towel on a clean dry surface. Also have a cake rack ready. (In the picture, I’m actually using an old roasting pan rack.)

    6) After removing cake from oven, looses the edges by running a knife to free the cake from the sides of the pan (if necessary). Some people like to use plastic knives for this, so they don’t scratch their pans, but I just try to be careful and not scrape the knife on the bottom of the pan.
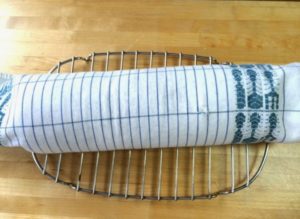
    Cooling on rack.

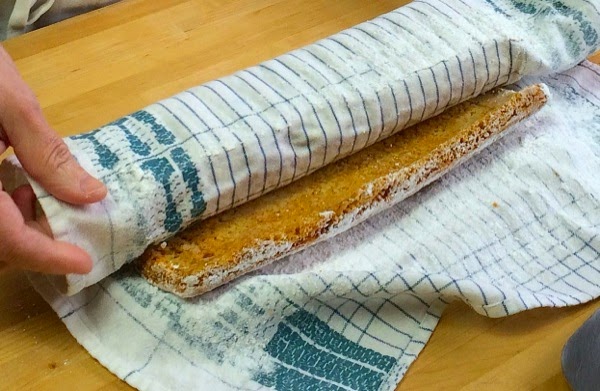
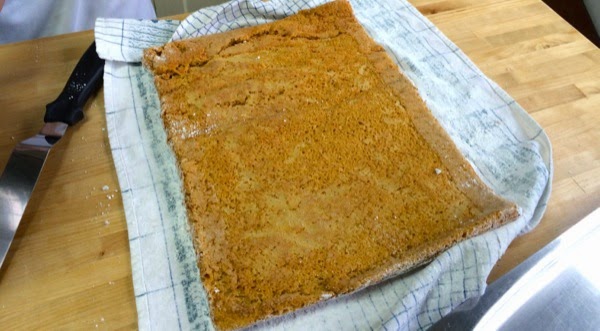
    7) Turn the pan upside down on the prepared towel to release the cake from the pan. Carefully roll up using the towel to help. Place the rolled cake on a rack to cool.

    8) When cake is just about cooled (I put mine in the fridge to speed things up), prepare filling.

    Filling Recipe:
    8 oz. package cream cheese, softened
    1 cup powdered sugar (original recipe said to sift, but I didn’t)
    6 tablespoons butter, softened (original recipe said butter or margarine, but please…)
    1 teaspoon vanilla extract
    Extra powdered sugar for the top

    Method:
    1) I softened the cream cheese (Trader Joe’s) and butter by placing them on a plate and very carefully microwaving at 15 second intervals until soft.

    2) Beat the cream cheese and powdered sugar until creamy and add vanilla. I use the paddle attachment on the Kitchen-aid stand mixer and whip until fluffy. (original recipe says beat until smooth)

    Put it all together:
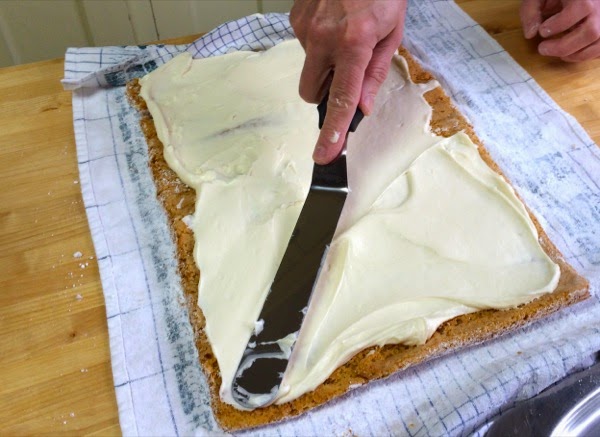
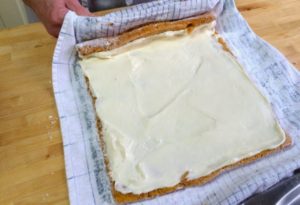
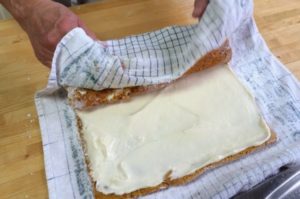
    1) Carefully unroll the cake and spread the filling gently going all the way to the edges.

    Unrolling

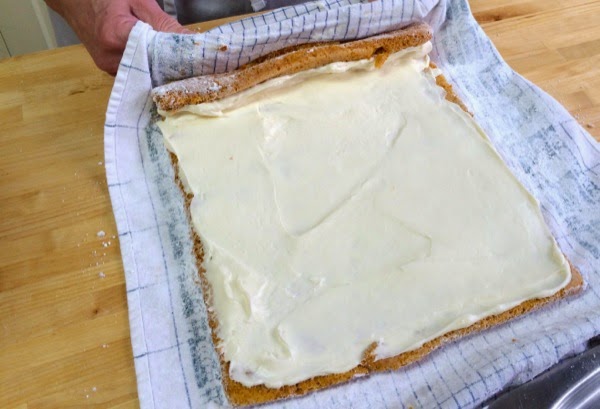
    Unrolled cake ready to fill. Can see the damage at the top of pic from not
    lining my pan to the edges, but you can’t tell in the finished product.

    Spread filling to the edges.

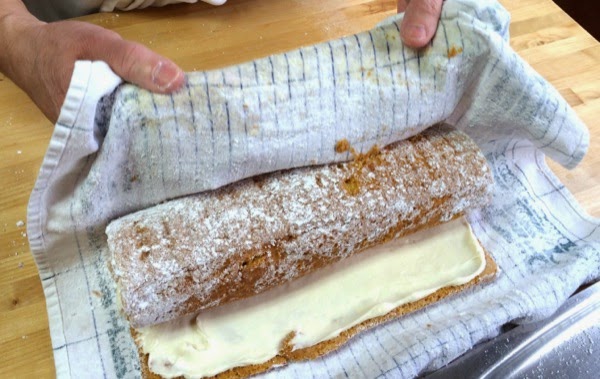
    2) Gently roll the cake back up, using the towel to help.

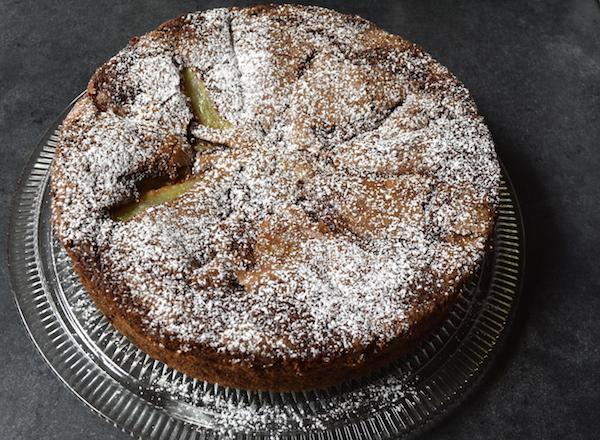
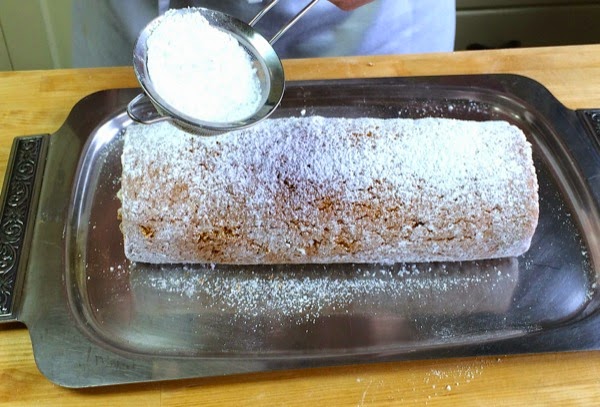
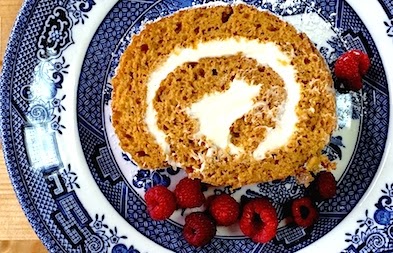
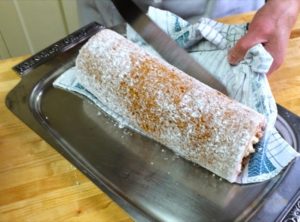
    3) Then gently escort it onto your platter before sprinkling with powdered sugar. (The original recipe says to wrap the cake with plastic wrap and chill before serving, which would make the filling firm, but I just sliced mine right away.) Eat cake!!

    Begin the roll Keep rolling
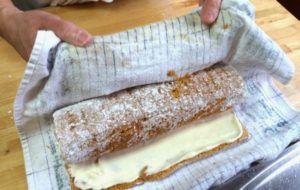
    You don’t even need to touch the cake.
    Let the towel work for you.
    Transfer cake to platter
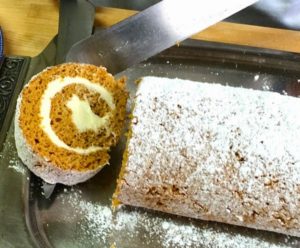
    Sprinkle with sifted powdered sugar Slice with a thin sharp knife and serve!